A professionally finished garage floor does more than improve appearance. It protects concrete from moisture, chemicals, and abrasion while creating a clean, durable surface that lasts for years. For homeowners and facility managers across the Mid-Atlantic and beyond, garage floor epoxy systems have become a popular upgrade because they combine performance with visual appeal.
Installing a garage floor epoxy system can be a successful DIY project when approached correctly. The key is understanding that preparation, timing, and product selection matter just as much as the coating itself.
Step One: Evaluate the Concrete Surface
Before any materials are opened, the condition of the concrete must be assessed. Epoxy does not hide flaws. It bonds to them. Cracks, moisture issues, oil stains, and surface contamination can all compromise adhesion.
Look for:
Hairline cracks or structural damage
Oil or chemical staining
Signs of moisture migration or efflorescence
Uneven or previously coated surfaces
The Concrete Network explains that proper surface evaluation is one of the most critical factors in epoxy flooring success, especially for residential garages.
Step Two: Prepare the Surface Thoroughly
Surface preparation is the most time-consuming part of the process, and also the most important. Skipping or rushing this step is the most common reason epoxy floors fail.
Preparation typically includes:
Mechanical grinding or acid etching to open the concrete pores
Degreasing and cleaning to remove contaminants
Vacuuming dust and debris
Repairing cracks and imperfections
According to Bob Vila’s home improvement guidance, proper prep can determine whether an epoxy floor lasts two years or twenty. This is the phase where many DIY installers underestimate the effort involved.
Step Three: Choose the Right Epoxy System
Not all epoxy products are the same. Professional-grade systems differ significantly from big-box store kits in terms of solids content, durability, and chemical resistance.
Consider:
Epoxy thickness and solids percentage
Whether a moisture barrier primer is needed
Decorative options such as flakes or metallic pigments
UV-stable topcoats to prevent yellowing
Epoxy Systems provides professional solutions for epoxy flooring, decorative concrete, terrazzo epoxy, and concrete restoration, offering materials and expertise that go far beyond basic consumer kits.
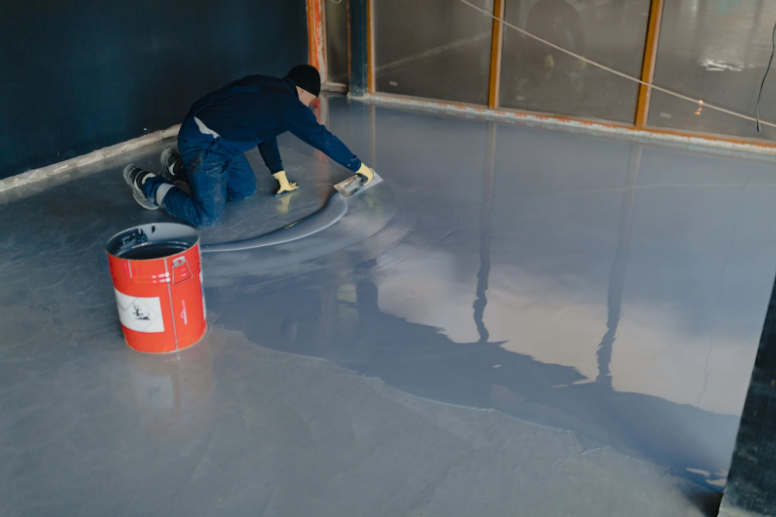
Step Four: Apply the Base Coat
Once the surface is properly prepared, the base coat can be applied. Timing matters here. Temperature, humidity, and pot life all affect performance.
General application steps include:
Mixing epoxy components precisely
Applying evenly using rollers and squeegees
Maintaining consistent thickness
Broadcasting decorative flakes if desired
The Occupational Safety and Health Administration emphasizes proper ventilation and protective equipment during epoxy application to ensure safe handling and curing.
Step Five: Add Decorative and Protective Layers
Decorative flakes or aggregates are typically added while the base coat is still wet. After curing, excess material is removed before applying a protective topcoat.
The topcoat:
Seals the system
Enhances durability
Improves slip resistance
Provides UV and chemical protection
This final layer determines how the floor performs under daily use.
Step Six: Allow Proper Curing Time
Curing is not immediate. While light foot traffic may be allowed within a day, full chemical resistance and strength take longer to develop.
Avoid:
Parking vehicles too soon
Exposing the floor to water before full cure
Heavy impact during early stages
Rushing this step can undo even the best installation work.
How Epoxy Systems Can Support Your Project at Any Stage
While many homeowners choose a DIY approach, others prefer guidance or professional assistance. Epoxy Systems can support your project at every phase, from surface evaluation and product selection to full installation services.
Their team assists with:
Product recommendations based on concrete condition
Professional surface preparation
Decorative concrete and terrazzo epoxy design
Complete epoxy flooring and concrete restoration services
Whether you want to install the system yourself or partner with professionals for critical steps, having expert support reduces risk and improves results.
Know When Professional Installation Makes Sense
DIY epoxy installation can be rewarding, but not every garage or facility is a good candidate. Moisture issues, large surface areas, or commercial-grade performance needs often require professional equipment and experience.
When durability, appearance, and longevity matter, expert involvement can save time and prevent costly failures.
Ready to Upgrade Your Garage Floor?
A well-installed epoxy system transforms concrete into a durable, attractive surface that performs for years. Whether you plan to tackle the project yourself or want professional support, having the right materials and guidance makes all the difference.
To learn more about epoxy flooring, decorative concrete, terrazzo epoxy, or concrete restoration, contact Epoxy Systems at 804-885-2990 or start your next project today.